Post by shoutforjoy on Aug 2, 2010 21:48:20 GMT
Here goes my first attenpt at a 'how to' guide. I enlisted the help of a glamorous assistent (aka teenage daughter after extra pocket money). Please let us know what you think.
When we bought our latest mini she had a horrendous stripe decal running the length of the car - across the centre of the bonnet, roof and boot. You can see what the mini looked like with the stripe in place here: autominiregister.proboards.com/index.cgi?board=project&action=display&thread=662
Needless to say we set about removing the stripe.
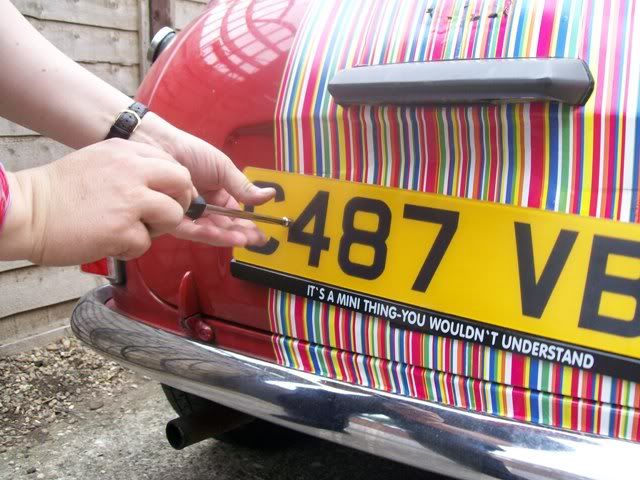
1: remove the trim as necessary. We had to remove the bumpers, grill, wipers, boot lock, number plate and number plate light.
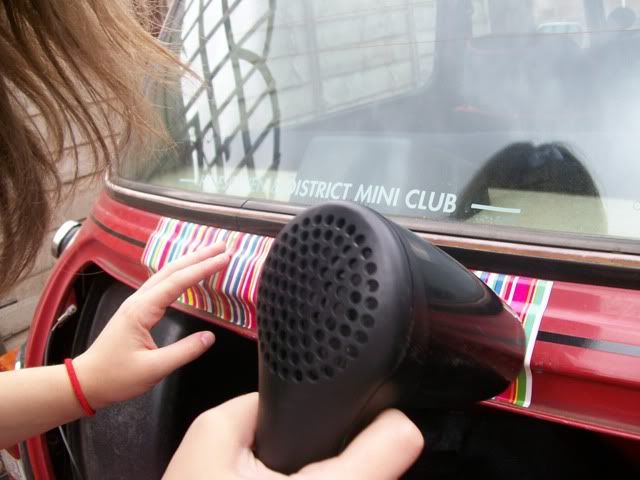
2: Using a hairdryer warm the decal that you want to remove. This will make the decal more flexible and soften the adhesive holding it in place.
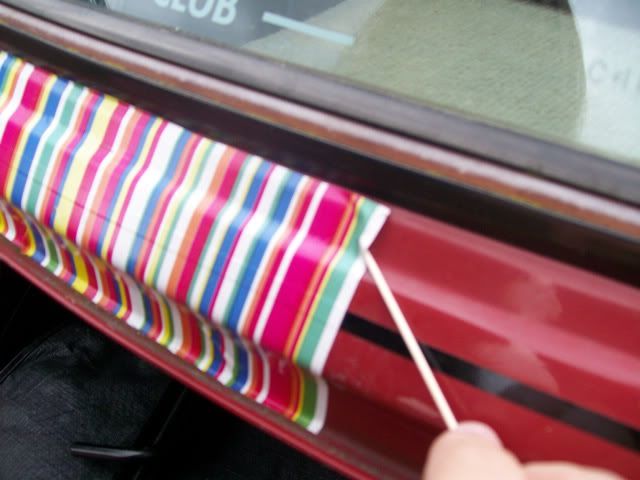
3: Begin to lift the decal. If you are struggling to get it to lift use a soft point (like a wooden cocktail stick) that will not damage the paintwork underneath.
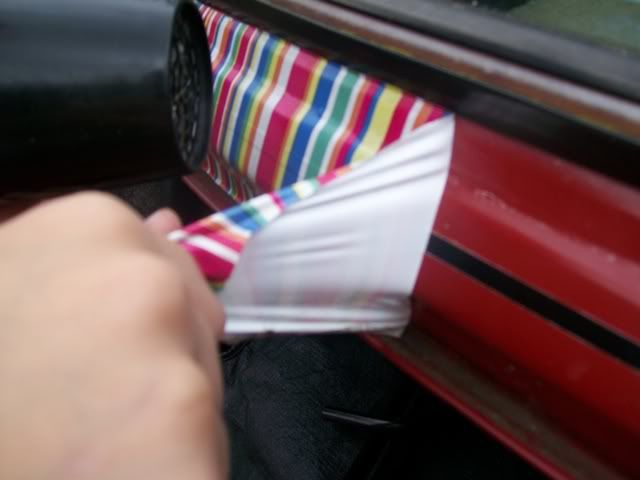
4: Continue to warm the decal using the hairdryer as you remove it.
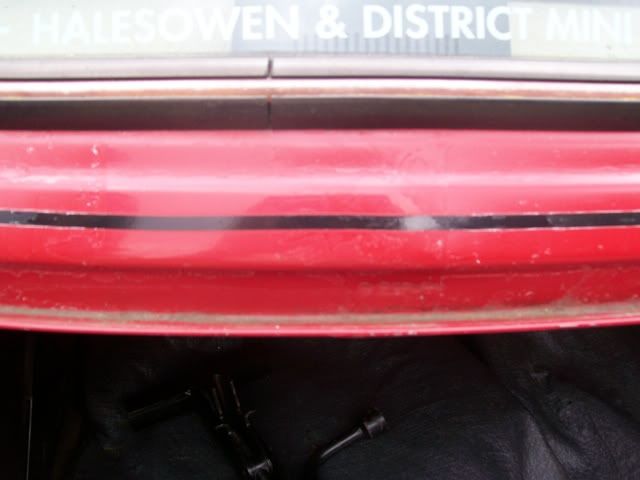
5: When it is removed you will see some residue of the adhesive that held the decal in place.
6: Remove this residue using a cloth soaked in white spirit.

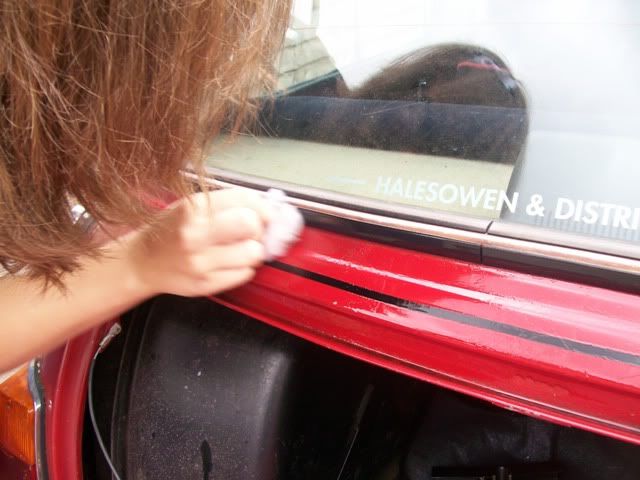
7: Finally, wash the paintwork using warm, soapy water.
You may find that there is a "ghost" stripe or other faint marks left on your paintwork, where the exposed paintwork has faded more than the paintwork covered by the decal. This can be removed using a cutting compound (T-cut, G3 or similar). We are planning to use cutting compound to restore all of the paintwork on the mini as the next stage of our makeover.
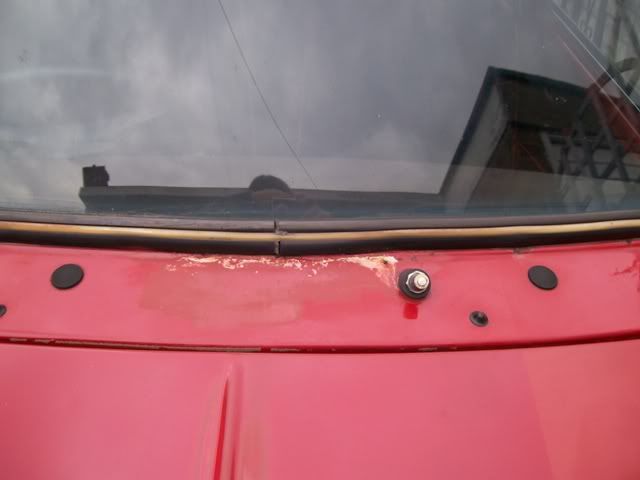
And lastly, a cautionary note. You may find that the decal was hiding something nasty. Spot the filler in this picture!
When we bought our latest mini she had a horrendous stripe decal running the length of the car - across the centre of the bonnet, roof and boot. You can see what the mini looked like with the stripe in place here: autominiregister.proboards.com/index.cgi?board=project&action=display&thread=662
Needless to say we set about removing the stripe.
1: remove the trim as necessary. We had to remove the bumpers, grill, wipers, boot lock, number plate and number plate light.
2: Using a hairdryer warm the decal that you want to remove. This will make the decal more flexible and soften the adhesive holding it in place.
3: Begin to lift the decal. If you are struggling to get it to lift use a soft point (like a wooden cocktail stick) that will not damage the paintwork underneath.
4: Continue to warm the decal using the hairdryer as you remove it.
5: When it is removed you will see some residue of the adhesive that held the decal in place.
6: Remove this residue using a cloth soaked in white spirit.
7: Finally, wash the paintwork using warm, soapy water.
You may find that there is a "ghost" stripe or other faint marks left on your paintwork, where the exposed paintwork has faded more than the paintwork covered by the decal. This can be removed using a cutting compound (T-cut, G3 or similar). We are planning to use cutting compound to restore all of the paintwork on the mini as the next stage of our makeover.
And lastly, a cautionary note. You may find that the decal was hiding something nasty. Spot the filler in this picture!